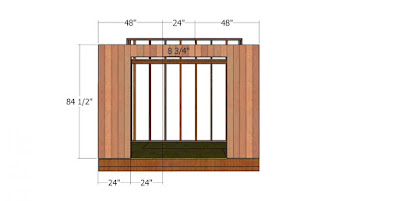
Now it's time to move on to the next crucial step - installing the roof. The roof is an essential component of any shed as it protects the interior from the elements and provides structural stability. In this section, we will guide you through the process of installing the roof on your lean-to shed, ensuring that it is done correctly for a durable and weatherproof finish.
Materials You Will Need:
- Roofing material of your choice (such as asphalt shingles, metal roofing, or corrugated panels)
- Roofing nails or screws
- Roofing underlayment (such as felt paper or synthetic underlayment)
- Drip edge
- Roofing ventilation (such as ridge vents or soffit vents)
- Roofing sealant or caulk
- Roofing tools (such as a hammer, roofing nails, roofing screws, roofing knife, chalk line, tape measure, and a ladder)
Step 1: Install Roofing Underlayment
The first step in installing the roof on your lean-to shed is to lay down the roofing underlayment. Roofing underlayment is a protective layer that goes under the roofing material and provides an additional barrier against moisture and helps to create a weatherproof seal. There are different types of underlayment available, such as felt paper or synthetic underlayment. Follow the manufacturer's instructions for the specific type of underlayment you are using.
To install the underlayment, start at the bottom edge of the roof and roll out the underlayment horizontally, overlapping each row by at least 6 inches. Secure the underlayment to the roof using roofing nails or staples, following the manufacturer's recommendations for fastener spacing. Ensure that the underlayment is smooth and free of any wrinkles or gaps.
Step 2: Install Drip Edge
Drip edge is a metal flashing that is installed along the edges of the roof to protect against water damage and help direct water away from the fascia and soffit. Install drip edge along the eaves (lower edge) and rakes (sloping edges) of the roof. Start at one corner of the roof and nail or screw the drip edge in place, overlapping the sections by at least 1 inch. Use roofing nails or screws, spaced according to the manufacturer's recommendations, to secure the drip edge to the roof.
Step 3: Install Roofing Material
Next, it's time to install the actual roofing material on your lean-to shed. The type of roofing material you choose will depend on your personal preference, budget, and climate. Some common options include asphalt shingles, metal roofing, or corrugated panels.
If you are installing asphalt shingles, start at the bottom edge of the roof and lay the first row of shingles, ensuring that they overhang the drip edge by about 1/2 inch. Use roofing nails to secure the shingles in place, following the manufacturer's recommendations for fastener placement. Continue installing additional rows of shingles, staggering the seams and overlapping each row to ensure proper water shedding. Use a chalk line or straight edge to keep the rows straight and level.
If you are installing metal roofing, start at one corner of the roof and lay the first panel, aligning it with the edge of the roof and overlapping the drip edge. Use roofing screws to attach the panel to the roof, following the manufacturer's recommendations for spacing and fastener placement. Install the remaining panels, overlapping each panel by at least one rib to ensure proper water shedding. Use a roofing knife or metal shears to cut the panels to size as needed.
If you are installing corrugated panels, start at one corner of the roof and align the first panel with the edge of the roof and the drip edge. Use roofing screws to attach the panel to the roof, following the manufacturer's recommendations for spacing and fastener placement. Install the remaining panels, overlapping each panel by at least one corrugation to ensure proper water shedding. Use a roofing knife or metal shears to cut the panels to size as needed.
Step 4: Install Roofing Ventilation
Ventilation is an essential aspect of any roof to allow for proper airflow and prevent moisture buildup. Depending on the design and location of your lean-to shed, you may need to install ridge vents, soffit vents, or other types of ventilation to promote air circulation and prevent condensation. Follow the manufacturer's instructions for the specific type of ventilation you are using, and ensure that it is properly installed to promote adequate airflow in your shed's roof.
Step 5: Apply Roofing Sealant or Caulk
To ensure a watertight seal and prevent leaks, it's important to apply roofing sealant or caulk to any gaps or seams in the roof. Use a high-quality roofing sealant or caulk that is compatible with the type of roofing material you are using. Apply it along the edges of the roof, around vent openings, and any other areas where water may be able to penetrate the roof. Smooth out the sealant or caulk with a caulk smoothing tool or a putty knife to create a neat and even seal.
Step 6: Final Checks
Once you have installed the roofing material, ventilation, and applied sealant or caulk, take a moment to do a final check of your work. Ensure that all fasteners are properly secured, and there are no visible gaps or seams that may allow water to penetrate the roof. Check for any signs of damage or potential issues, and address them promptly to ensure a durable and weatherproof roof for your lean-to shed.
Conclusion
Installing the roof on your 8x10 lean-to shed is a crucial step in the shed construction process. It protects your shed's interior from the elements and ensures structural stability. By following the steps outlined in this article, using the proper materials and techniques, you can confidently install a roof that is durable, weatherproof, and adds beauty and functionality to your lean-to shed. Remember to always follow manufacturer's instructions, local building codes, and best practices for safe and effective shed construction.

0 comments:
Post a Comment
Note: Only a member of this blog may post a comment.