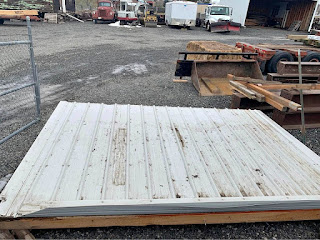
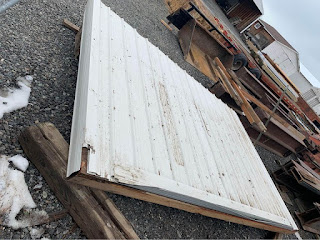
Building a lean to shed can be a practical and cost-effective solution for adding storage space to your property. One of the crucial elements of constructing a lean to shed is the roof. In this article, we will provide you with step-by-step instructions on how to build a lean to shed roof, including materials, tools, and techniques required for the project. Whether you're a DIY enthusiast or a beginner in construction, this guide will walk you through the process of building a sturdy and functional lean to shed roof.
Materials and Tools:
Before starting the construction process, gather the following materials and tools:
- Lumber for roof framing, such as 2x4 or 2x6 boards
- Plywood or OSB sheets for sheathing
- Roofing shingles or other roofing material
- Nails or screws
- Roofing felt or underlayment
- Tape measure, level, and square
- Circular saw or miter saw
- Hammer or nail gun
- Roofing nails or screws
- Roofing paper or tar paper
Step 1: Prepare the Shed
Before you start building the lean to shed roof, make sure the shed's walls are properly constructed and securely fastened to the ground. Check for any gaps, rot, or damage that may need to be repaired. Ensure that the shed walls are level and square, as the roof's stability and durability depend on the shed's structural integrity.
Step 2: Measure and Cut the Roof Framing
Using a tape measure, measure the length and width of the shed to determine the size of the roof framing members. Cut the roof rafters and headers to the appropriate length using a circular saw or miter saw. Make sure to use a level and square to ensure accurate and straight cuts.
Step 3: Install the Roof Framing
Attach the roof rafters to the headers with nails or screws, following the design and pitch of the roof. Make sure the rafters are evenly spaced and properly aligned. Use a level to check for plumb and a square to ensure the angles are correct. Fasten the rafters to the shed walls using nails or screws, ensuring a secure connection.
Step 4: Install the Sheathing
Once the roof framing is in place, install the sheathing on top of the rafters. Use plywood or OSB sheets, and attach them to the rafters with nails or screws. Make sure the sheathing is flush with the edges of the roof framing and properly aligned.
Step 5: Install the Roofing Material
Now it's time to install the roofing material on top of the sheathing. Depending on your preference and budget, you can use roofing shingles, metal roofing, or other roofing materials. Follow the manufacturer's instructions for installation, ensuring proper overlapping and fastening.
Step 6: Install Roofing Felt or Underlayment
Before installing the roofing material, it's important to add a layer of roofing felt or underlayment to provide additional protection against moisture and ensure a watertight seal. Unroll the roofing felt or underlayment over the sheathing, starting from the bottom and overlapping each row by a few inches. Secure the felt or underlayment with roofing nails or staples, following the manufacturer's recommendations.
Step 7: Add Flashing
To prevent water from seeping through the roof edges and joints, it's crucial to install flashing. Flashing is a waterproof material that is used to seal gaps and joints in the roof. Install flashing around the roof edges, valleys, and any other areas where water may penetrate. Use nails or screws to secure the flashing, and ensure it overlaps properly to create a watertight seal.
Step 8: Install Trim and Fascia
To give your lean to shed roof a finished look and provide additional protection, install trim and fascia. Trim is used to cover the edges of the roof and create a clean and professional appearance, while fascia is used to protect the ends of the rafters from weather damage. Attach the trim and fascia using nails or screws, and make sure they are properly aligned and secured to the roof framing.
FAQs (Frequently Asked Questions)
Q: What type of roofing material is best for a lean to shed roof?
A: The choice of roofing material for a lean to shed roof depends on personal preference, budget, and climate. Common options include asphalt shingles, metal roofing, and corrugated plastic roofing. Each has its advantages and disadvantages, so research and choose the one that best suits your needs.
Q: Do I need a building permit to construct a lean to shed roof?
A: Building permit requirements vary by location, so it's essential to check with your local building department before starting any construction project, including a lean to shed roof. In some areas, a building permit may be required for sheds exceeding a certain size or height. It's important to comply with local building codes and regulations to avoid fines or penalties.
Q: How do I calculate the pitch of a lean to shed roof?
A: The pitch of a roof refers to the slope or steepness of the roof. To calculate the pitch of a lean to shed roof, measure the vertical rise (height) from the lowest point of the shed to the highest point of the shed, and divide it by the horizontal run (length) from the lowest point to the highest point. Multiply the result by 12 to get the pitch in inches per foot. For example, if the rise is 24 inches and the run is 96 inches, the pitch would be 6:12 (24/96 x 12).
Conclusion
Building a lean to shed roof may seem daunting, but with proper planning and step-by-step instructions, it can be a manageable DIY project. By following the steps outlined in this article and using the appropriate materials and tools, you can construct a sturdy and functional lean to shed roof that will provide reliable protection for your belongings. Remember to check local building codes and regulations, and always prioritize safety during construction. With patience and perseverance, you can successfully build a lean to shed roof and enhance the functionality and aesthetics of your outdoor space.


0 comments:
Post a Comment
Note: Only a member of this blog may post a comment.