Showing posts with label 8x10. Show all posts

Wednesday, April 12, 2023

How to Install the Roof on Your 8x10 Lean-To Shed

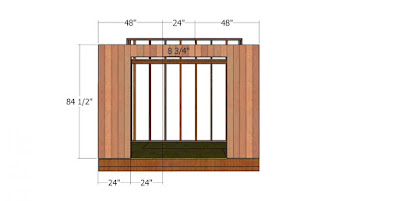
how to build a roof of 8x10

Now it's time to move on to the next crucial step - installing the roof. The roof is an essential component of any shed as it protects the interior from the elements and provides structural stability. In this section, we will guide you through the process of installing the roof on your lean-to shed, ensuring that it is done correctly for a durable and weatherproof finish.

Materials You Will Need:

  • Roofing material of your choice (such as asphalt shingles, metal roofing, or corrugated panels)
  • Roofing nails or screws
  • Roofing underlayment (such as felt paper or synthetic underlayment)
  • Drip edge
  • Roofing ventilation (such as ridge vents or soffit vents)
  • Roofing sealant or caulk
  • Roofing tools (such as a hammer, roofing nails, roofing screws, roofing knife, chalk line, tape measure, and a ladder)

Step 1: Install Roofing Underlayment

The first step in installing the roof on your lean-to shed is to lay down the roofing underlayment. Roofing underlayment is a protective layer that goes under the roofing material and provides an additional barrier against moisture and helps to create a weatherproof seal. There are different types of underlayment available, such as felt paper or synthetic underlayment. Follow the manufacturer's instructions for the specific type of underlayment you are using.

To install the underlayment, start at the bottom edge of the roof and roll out the underlayment horizontally, overlapping each row by at least 6 inches. Secure the underlayment to the roof using roofing nails or staples, following the manufacturer's recommendations for fastener spacing. Ensure that the underlayment is smooth and free of any wrinkles or gaps.

Step 2: Install Drip Edge

Drip edge is a metal flashing that is installed along the edges of the roof to protect against water damage and help direct water away from the fascia and soffit. Install drip edge along the eaves (lower edge) and rakes (sloping edges) of the roof. Start at one corner of the roof and nail or screw the drip edge in place, overlapping the sections by at least 1 inch. Use roofing nails or screws, spaced according to the manufacturer's recommendations, to secure the drip edge to the roof.

Step 3: Install Roofing Material

Next, it's time to install the actual roofing material on your lean-to shed. The type of roofing material you choose will depend on your personal preference, budget, and climate. Some common options include asphalt shingles, metal roofing, or corrugated panels.

If you are installing asphalt shingles, start at the bottom edge of the roof and lay the first row of shingles, ensuring that they overhang the drip edge by about 1/2 inch. Use roofing nails to secure the shingles in place, following the manufacturer's recommendations for fastener placement. Continue installing additional rows of shingles, staggering the seams and overlapping each row to ensure proper water shedding. Use a chalk line or straight edge to keep the rows straight and level.

If you are installing metal roofing, start at one corner of the roof and lay the first panel, aligning it with the edge of the roof and overlapping the drip edge. Use roofing screws to attach the panel to the roof, following the manufacturer's recommendations for spacing and fastener placement. Install the remaining panels, overlapping each panel by at least one rib to ensure proper water shedding. Use a roofing knife or metal shears to cut the panels to size as needed.

If you are installing corrugated panels, start at one corner of the roof and align the first panel with the edge of the roof and the drip edge. Use roofing screws to attach the panel to the roof, following the manufacturer's recommendations for spacing and fastener placement. Install the remaining panels, overlapping each panel by at least one corrugation to ensure proper water shedding. Use a roofing knife or metal shears to cut the panels to size as needed.

Step 4: Install Roofing Ventilation

Ventilation is an essential aspect of any roof to allow for proper airflow and prevent moisture buildup. Depending on the design and location of your lean-to shed, you may need to install ridge vents, soffit vents, or other types of ventilation to promote air circulation and prevent condensation. Follow the manufacturer's instructions for the specific type of ventilation you are using, and ensure that it is properly installed to promote adequate airflow in your shed's roof.

Step 5: Apply Roofing Sealant or Caulk

To ensure a watertight seal and prevent leaks, it's important to apply roofing sealant or caulk to any gaps or seams in the roof. Use a high-quality roofing sealant or caulk that is compatible with the type of roofing material you are using. Apply it along the edges of the roof, around vent openings, and any other areas where water may be able to penetrate the roof. Smooth out the sealant or caulk with a caulk smoothing tool or a putty knife to create a neat and even seal.

Step 6: Final Checks

Once you have installed the roofing material, ventilation, and applied sealant or caulk, take a moment to do a final check of your work. Ensure that all fasteners are properly secured, and there are no visible gaps or seams that may allow water to penetrate the roof. Check for any signs of damage or potential issues, and address them promptly to ensure a durable and weatherproof roof for your lean-to shed.

Conclusion

Installing the roof on your 8x10 lean-to shed is a crucial step in the shed construction process. It protects your shed's interior from the elements and ensures structural stability. By following the steps outlined in this article, using the proper materials and techniques, you can confidently install a roof that is durable, weatherproof, and adds beauty and functionality to your lean-to shed. Remember to always follow manufacturer's instructions, local building codes, and best practices for safe and effective shed construction.
Share:

Building a Solid Foundation for Your 8x10 Lean-To Shed

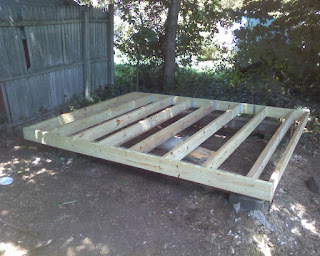
foundation for 8x10 shed

When it comes to constructing a shed, one of the most critical aspects to consider is the foundation. A solid and properly built foundation is crucial for ensuring the stability, durability, and longevity of your shed. In this article, we will discuss the importance of a solid foundation for your 8x10 lean-to shed and provide some essential tips and guidelines for building a sturdy foundation.

Why is a Solid Foundation Important?

The foundation is the base on which the entire structure of your shed rests. It serves to distribute the weight of the shed evenly and transfer it to the ground, providing stability and preventing settling or sinking of the shed. A solid foundation also helps to protect the shed from moisture, insects, and other potential damages.

Without a proper foundation, a shed can become unstable and susceptible to various issues, such as shifting, leaning, or sagging, which can lead to structural damage and compromise the integrity of the shed. A weak or improperly built foundation can also cause problems with doors, windows, and other shed components, leading to difficulty in operation and reduced functionality.

Choosing the Right Foundation Type

There are several different types of foundations to choose from when building a shed, and the right choice will depend on factors such as the local building codes, site conditions, budget, and personal preferences. Here are some common foundation types for an 8x10 lean-to shed:

1. Concrete Slab:

A concrete slab foundation is a popular choice for sheds due to its durability, stability, and low maintenance requirements. It involves pouring a level slab of concrete directly onto the ground and allowing it to cure. The shed is then built on top of the cured slab, which provides a stable and level surface for the shed to rest on. A concrete slab foundation is suitable for areas with stable soil conditions and provides a solid base for heavy sheds or sheds that will be used for heavy equipment or vehicles.

2. Gravel Pad:

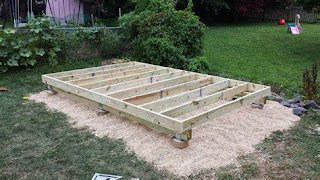
A gravel pad foundation is a cost-effective and relatively simple option for sheds. It involves leveling the ground and placing a layer of gravel or crushed stone on top. The shed is then built on top of the gravel pad. Gravel pads provide good drainage and stability, making them suitable for areas with good soil drainage and stable ground conditions. However, they may not be ideal for areas with poor soil drainage or high water table levels.

3. Concrete Pier Foundation:

A concrete pier foundation, also known as a post foundation or pier-and-beam foundation, involves pouring concrete footings or piers at specific points along the perimeter of the shed, and supporting the shed on these piers with beams. This type of foundation is suitable for areas with uneven or sloping ground, as it allows for adjustments to be made to level the shed. Concrete pier foundations provide good stability and durability, but may require more labor and materials compared to other foundation types.

Building the Foundation

Once you have chosen the appropriate foundation type for your 8x10 lean-to shed, it's important to follow proper construction techniques to ensure a solid and stable foundation. Here are some general guidelines to consider:

1. Site Preparation:

Prepare the site by clearing away any debris, vegetation, or obstacles. Level the ground to ensure a flat and stable surface for the foundation. Remove any rocks, roots, or other objects that may interfere with the construction of the foundation.

2. Layout and Marking:

Using a measuring tape and stakes, mark out the dimensions of your 8x10 shed on the prepared site. Make sure the corners are square and the layout is accurate, as this will determine the overall alignment and levelness of the shed.

3. Construction of the Foundation:

Follow the specific construction techniques for the chosen foundation type. For a concrete slab foundation, excavate the site to the required depth, install formwork to contain the concrete, pour and level the concrete, and allow it to cure. For a gravel pad foundation, spread a layer of gravel or crushed stone on the prepared site and level it. For a concrete pier foundation, dig holes for the footings or piers, pour and level the concrete, and install the beams.

4. Leveling and Alignment:

Ensure that the foundation is level, square, and aligned according to the shed's dimensions. Use a level, string lines, and measuring tools to check for levelness and alignment in all directions. Make any necessary adjustments to ensure a uniform and stable foundation for the shed.

5. Anchoring the Shed:

Once the foundation is complete and cured (if applicable), anchor the shed to the foundation for added stability. Use anchor bolts, brackets, or other suitable fasteners to securely attach the shed to the foundation. Follow the manufacturer's instructions or consult with a structural engineer for the appropriate anchoring methods for your shed and foundation type.

6. Backfilling and Drainage:

If you have chosen a foundation type that requires backfilling, such as a concrete pier foundation, ensure that the backfilled soil is properly compacted and graded away from the shed to promote proper drainage. This will help prevent water from pooling around the foundation and causing moisture-related issues.

Conclusion

Building a solid foundation for your 8x10 lean-to shed is a crucial step in ensuring its stability, durability, and longevity. It's important to choose the appropriate foundation type for your site conditions and follow proper construction techniques to ensure a stable and level base for your shed. By investing time and effort into building a solid foundation, you can enjoy a sturdy and reliable shed that will last for years to come.

Share:

8x10 Lean-To Shed: Using Pressure-Treated Lumber for Base, Walls, and Roof Framing

8x10 Lean-To Shed Using Pressure-Treated Lumber for Base

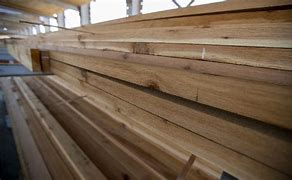
If you're planning to build an 8x10 lean-to shed, one of the most critical decisions you'll need to make is choosing the right materials. Among the many options available, pressure-treated lumber stands out as a popular choice for the base, walls, and roof framing of a shed. In this article, we'll explore why pressure-treated lumber is an excellent option for shed construction and provide some tips for using it effectively. So let's dive in and learn more about this durable and reliable material!

Why Choose Pressure-Treated Lumber?

Pressure-treated lumber is wood that has been treated with chemicals to protect it from rot, decay, and insect damage. The treatment process involves placing the wood in a pressure chamber and forcing preservatives deep into the wood fibers, creating a long-lasting and durable material that is resistant to moisture and pests. Here are some reasons why pressure-treated lumber is a popular choice for shed construction:

1. Rot and Decay Resistance:

Sheds are exposed to the elements, including rain, snow, and humidity, which can cause wood to rot and decay over time. Pressure-treated lumber is specially treated to resist rot and decay, making it ideal for shed construction. It can withstand exposure to moisture without deteriorating, ensuring the longevity and durability of your shed.

2. Insect Resistance:

Insects like termites, carpenter ants, and beetles can cause significant damage to wood structures, including sheds. Pressure-treated lumber is treated with preservatives that repel insects, protecting your shed from infestations and potential structural damage.

3. Durability:

Pressure-treated lumber is designed to withstand harsh outdoor conditions and resist wear and tear. It is less susceptible to warping, splitting, and cracking compared to untreated wood, ensuring that your shed remains sturdy and reliable for years to come.

4. Cost-Effective:

While pressure-treated lumber may be slightly more expensive than untreated wood, it offers long-term cost savings due to its durability and resistance to rot, decay, and insects. Choosing pressure-treated lumber for your shed can help you avoid costly repairs or replacements in the future.

Using Pressure-Treated Lumber for Shed Construction

When using pressure-treated lumber for your 8x10 lean-to shed, it's essential to follow some best practices to ensure proper installation and maximum performance. Here are some tips to keep in mind:

1. Select the Right Grade and Size:

Pressure-treated lumber comes in different grades and sizes, so be sure to choose the right type for your shed construction. For framing, use a suitable grade, such as #2 or better, which offers good strength and durability. For the base, use treated lumber that is rated for ground contact to withstand moisture from the soil.

2. Use Appropriate Fasteners:

When working with pressure-treated lumber, it's important to use fasteners that are approved for use with treated wood to prevent corrosion and ensure proper installation. Use hot-dipped galvanized or stainless-steel nails, screws, or bolts that are specifically designed for use with treated lumber to avoid damage or premature failure of the fasteners.

3. Follow Proper Construction Techniques:

Follow industry-approved construction techniques when using pressure-treated lumber for your shed framing. Use appropriate framing techniques such as standard stud spacing, proper notching and joining of framing members, and appropriate bracing to ensure structural integrity. It's also essential to follow local building codes and regulations for shed construction, including any specific requirements for pressure-treated lumber.

4. Protect Exposed Ends and Cuts:

When cutting pressure-treated lumber, be sure to protect the exposed ends and cuts with an appropriate wood preservative. The cut ends of pressure-treated lumber are more susceptible to moisture and insect damage, so applying a wood preservative to these areas will help prevent rot and decay. Follow the manufacturer's instructions for the wood preservative and allow it to dry before proceeding with the construction.

5. Allow for Proper Ventilation:

Proper ventilation is crucial for sheds to prevent moisture buildup and promote airflow. When using pressure-treated lumber for walls and roof framing, ensure that there is adequate ventilation to allow for proper air circulation. This can be achieved by leaving gaps between boards or using vents in the walls or roof of the shed, as recommended by your shed plans or local building codes.

6. Maintain Regular Maintenance:

While pressure-treated lumber is resistant to rot, decay, and insects, regular maintenance is still necessary to ensure its long-term performance. Periodically inspect your shed for any signs of damage or decay, and address them promptly. Apply wood preservative or stain as needed to protect the wood from moisture and UV rays. Regular maintenance will help prolong the lifespan of your shed and keep it in good condition for years to come.

Conclusion

Using pressure-treated lumber for the base, walls, and roof framing of your 8x10 lean-to shed is an excellent choice for its durability, resistance to rot, decay, and insects, and long-term cost savings. By following proper installation techniques, protecting exposed ends and cuts, allowing for proper ventilation, and maintaining regular maintenance, you can ensure that your shed remains sturdy and reliable for many years. Remember to always follow local building codes and regulations and consult your shed plans or a professional if you have any questions or concerns. Happy building!

Share:

Plywood for the Walls and Roof sheathing 8x10 Lean-To Shed

best lumber for a shed base

When it comes to building a sturdy and reliable 8x10 lean-to shed, choosing the right materials for the walls and roof sheathing is crucial. Plywood is a popular and versatile choice that provides strength, durability, and ease of installation. Here's what you need to know about using plywood for the walls and roof sheathing of your shed.

Why Choose Plywood?

Plywood is a type of engineered wood that is made by bonding together multiple layers of thin wood veneers with adhesives, creating a strong and durable panel. This construction method results in a panel that is less prone to warping, splitting, and shrinking compared to solid wood, making it an ideal choice for construction projects like shed walls and roof sheathing.

Plywood is also known for its versatility, as it comes in various thicknesses, grades, and types, allowing you to choose the right plywood for your specific shed project. It is available in both exterior and interior grades, with exterior-grade plywood being suitable for outdoor applications due to its water resistance and ability to withstand the elements.

Another advantage of plywood is its ease of installation. It can be easily cut, nailed, and screwed, making it a popular choice for DIY shed builders. Additionally, plywood can be painted or stained to match your desired aesthetic, providing a polished and finished look to your shed.

Choosing Plywood for Walls and Roof Sheathing

When selecting plywood for your shed walls and roof sheathing, it's important to consider the following factors:

1. Thickness:

The thickness of the plywood you choose will depend on the load-bearing requirements of your shed. For walls, 1/2" or 5/8" plywood is usually sufficient, while for roof sheathing, 5/8" or 3/4" plywood is typically recommended. However, it's always a good idea to consult local building codes and regulations to ensure you choose the appropriate thickness for your specific location and shed design.

2. Grade:

Plywood comes in different grades, which determine its quality and suitability for various applications. For shed walls and roof sheathing, it's recommended to use exterior-grade plywood, as it is designed to withstand moisture and exposure to the elements. Exterior-grade plywood is typically labeled as "Exterior" or "Exposure 1" and is made with water-resistant adhesives that provide added durability and resistance to decay and rot.

3. Type:

Plywood is available in different types, such as CDX, BCX, and T1-11, each with its unique features and uses. CDX plywood is the most common type used for shed walls and roof sheathing, as it is affordable and provides good structural strength. BCX plywood is a higher-grade option that has a smoother surface and fewer knots, making it suitable for applications where appearance is a concern. T1-11 plywood is a type of siding plywood that has a textured surface and is commonly used for shed walls to provide a rustic look.

Installation Tips

When installing plywood for your shed walls and roof sheathing, consider the following tips:

1. Proper Fastening:

Use the appropriate fasteners, such as nails or screws, and follow the manufacturer's recommendations for spacing and placement. Make sure to fasten the plywood to the underlying framing, typically at 16-inch intervals for walls and 6-inch intervals for roof sheathing, to ensure proper structural support.

2. Sealing and Priming:

Before installation, seal the edges and ends of the plywood panels with a wood sealer or primer to protect them from moisture and prevent delamination. This step is especially important for exterior-grade plywood used in shed walls and roof sheathing, as it will help prolong the lifespan of the plywood and enhance its performance.

3. Proper Overlapping:

When installing plywood panels, make sure to overlap the seams properly to create a tight and secure fit. Follow the manufacturer's instructions for the recommended overlapping pattern, and ensure that the edges of the plywood panels are aligned and flush with each other to avoid gaps or uneven surfaces.

4. Ventilation:

Proper ventilation is essential for preventing moisture buildup inside the shed, which can lead to rot and decay of the plywood. Install vents or windows to allow for adequate airflow and moisture escape, especially in the roof area where condensation can occur.

5. Finishing:

After the plywood is installed, you may choose to paint or stain it to protect it from the elements and enhance its appearance. Follow the manufacturer's recommendations for the appropriate type of paint or stain for plywood, and apply it according to the instructions for the best results.

Conclusion

Plywood is a reliable and versatile material for building the walls and roof sheathing of your 8x10 lean-to shed. Its strength, durability, and ease of installation make it a popular choice among DIY shed builders. By choosing the right thickness, grade, and type of plywood, and following proper installation techniques, you can ensure a sturdy and long-lasting shed that will withstand the test of time.

Share:

Build an 8x10 Lean-To Shed: Step-by-Step Plans


8x10 lean to shed plan

Welcome to the world of woodworking! Building a shed can be a rewarding and practical project that adds valuable storage space to your outdoor area. One popular option is an 8x10 lean-to shed, which is a versatile and space-saving design that can easily fit in your backyard or garden. In this article, we will provide you with step-by-step plans for building an 8x10 lean-to shed, complete with detailed instructions, measurements, and tips to make the process smooth and successful. Let's get started!

Step 1: Gather Your Materials and Tools

Before you start building your 8x10 lean-to shed, you'll need to gather all the necessary materials and tools. Here's a list of what you'll need:

Make sure to use quality materials that are suitable for outdoor use and can withstand the weather conditions in your area. It's also important to have the necessary permits and check local building codes before starting your project.

Step 2: Prepare the Site

Once you have gathered all the materials and tools, it's time to prepare the site where you will be building your 8x10 lean-to shed. Start by clearing the area of any debris, rocks, or vegetation. Level the ground and mark the perimeter of the shed using stakes and string.

Next, dig holes for the shed's foundation posts, which will provide support and stability to the structure. The number of posts you will need will depend on the design and local building codes. Typically, two to four posts are used for an 8x10 lean-to shed. Make sure the holes are deep enough and level, and set the posts in concrete to secure them in place. Allow the concrete to cure according to the manufacturer's instructions.

Step 3: Build the Base

With the foundation posts in place, you can now proceed to build the base of your 8x10 lean-to shed. Start by attaching pressure-treated lumber beams to the posts to create the base frame. Use a level to ensure that the frame is level and square, and secure the beams to the posts with screws or nails.

Next, attach pressure-treated lumber joists across the base frame, spacing them according to the manufacturer's recommendations. These joists will provide support for the plywood flooring. Make sure the joists are level and square, and secure them to the base frame with screws or nails.

Finally, install plywood sheets on top of the joists to create the shed's flooring. Use a circular saw to cut the plywood sheets to size, and secure them to the joists with screws or nails, leaving a small gap between the sheets for expansion. Make sure the plywood is flush with the edges of the base frame, and use a level to ensure that the flooring is even and flat.

Step 4: Build the Walls

With the base in place, it's time to start building the walls of your 8x10 lean-to shed. Measure and cut pressure-treated lumber studs to the desired height of your shed walls, and attach them to the base frame with screws or nails. Make sure the studs are plumb and level, and leave spaces for windows and doors as desired.

Next, attach plywood sheets to the studs to create the walls of your shed. Use a circular saw to cut the plywood to size, and secure it to the studs with screws or nails. Make sure the plywood is flush with the edges of the studs and properly aligned. Install additional plywood sheets on the top of the walls to create the roof sheathing, leaving a small overhang for the roof.

Step 5: Install the Roof

Now it's time to install the roof on your 8x10 lean-to shed. Start by measuring and cutting pressure-treated lumber rafters to the desired length, ensuring that they are properly aligned and spaced according to your plans. Attach the rafters to the top of the walls with screws or nails, making sure they are level and aligned properly.

Next, install plywood sheets on top of the rafters to create the roof decking. Cut the plywood to size with a circular saw, and secure it to the rafters with screws or nails. Make sure the plywood is flush with the edges of the rafters and properly aligned. Install a moisture barrier, such as tar paper, on top of the roof decking to protect the shed from moisture and weather elements.

Finally, install the roofing material of your choice, such as shingles or metal sheets, according to the manufacturer's instructions. Make sure to properly seal the edges and corners to prevent leaks and ensure a durable roof for your shed.

Step 6: Install Doors and Windows

With the walls and roof in place, it's time to install doors and windows to complete your 8x10 lean-to shed. Measure and cut openings for doors and windows in the walls, and install the desired door and window frames according to the manufacturer's instructions.

Attach the doors and windows to the frames with hinges, and install a latch, handle, and any other necessary hardware to secure them properly. Make sure the doors and windows are properly aligned, and adjust as needed to ensure they open and close smoothly.

Step 7: Finish the Shed

With the basic structure of your 8x10 lean-to shed complete, it's time to add finishing touches to make it functional and stylish. You can paint or stain the shed to protect it from the elements and give it a polished look. Choose a color or finish that complements your outdoor space and personal style.

You can also add shelves, hooks, or other storage solutions to the interior of the shed to maximize its storage capacity. Consider adding a workbench or other accessories to create a functional workshop space. Additionally, landscaping around the shed with plants, gravel, or pavers can enhance its appearance and blend it seamlessly into your outdoor space.

Step 8: Maintain Your Shed

Once your 8x10 lean-to shed is complete, it's important to properly maintain it to ensure its durability and longevity. Regularly inspect the shed for any signs of damage, wear, or moisture, and address any issues promptly to prevent further damage.

Keep the shed clean and organized, and avoid overloading it with heavy items that could cause structural damage. Check the roofing material and replace any damaged or missing shingles or sheets to prevent leaks. Keep the doors and windows well-maintained, lubricated, and properly sealed to ensure they function properly and keep the shed secure. During the winter months, it's important to clear snow and ice from the roof to prevent excessive weight and potential damage. Additionally, consider applying a waterproof sealant or paint to the exterior of the shed every few years to protect it from moisture and weathering. By following these maintenance tips, you can extend the lifespan of your 8x10 lean-to shed and keep it looking and functioning its best for years to come.

Conclusion

Building an 8x10 lean-to shed can be a rewarding woodworking project that provides you with a functional and stylish storage solution for your outdoor space. By following the steps outlined in this article and using quality materials and tools, you can confidently construct a sturdy and durable shed that will serve you well for years to come.

Remember to carefully plan and measure your shed, use proper safety precautions, and consult relevant building codes and regulations in your area. With patience, attention to detail, and some woodworking skills, you can successfully build a shed that meets your needs and enhances the aesthetic of your outdoor space.

So gather your tools, pick up some lumber, and get ready to embark on a woodworking adventure as you build your very own 8x10 lean-to shed!

diy 8x10 lean to shed

Share: