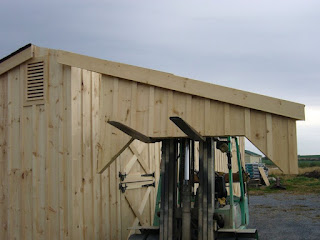
A lean-to shed is a practical and cost-effective way to add extra storage space or create a sheltered area for various purposes. One crucial aspect of building a lean-to shed is the roof overhang, which provides protection from the elements and adds aesthetic appeal to the structure. In this comprehensive guide, we will walk you through the steps of building a lean-to shed roof overhang, including materials, tools, and techniques required for a successful construction project.
Understanding Lean-to Shed Roof Overhang
Before diving into the construction process, it's essential to understand what a roof overhang is and why it's important for a lean-to shed. A roof overhang refers to the portion of the roof that extends beyond the exterior walls of the shed. It provides several benefits, including:
- Protection from rain, snow, and other elements: The roof overhang helps to keep water away from the walls of the shed, preventing moisture damage and rot.
- Shade and shelter: The roof overhang creates a shaded area underneath the shed, which can be used as a covered workspace, seating area, or storage for outdoor equipment.
- Aesthetics: The roof overhang adds visual appeal to the shed, giving it a more finished and professional look.
Materials and Tools You'll Need
Before starting the construction of a lean-to shed roof overhang, gather the following materials and tools:
Materials:
- Lumber for rafters and roof framing
- Roofing materials such as shingles, metal panels, or other appropriate roofing material
- Nails or screws
- Flashing
- Construction adhesive
Tools:
- Measuring tape
- Pencil or marker
- Circular saw or miter saw
- Level
- Hammer or nail gun
- Screwdriver or drill
- Ladder or scaffolding
- Roofing tools such as a roofing nailer or tin snips
Step-by-Step Guide to Build a Lean-to Shed Roof Overhang
Now let's dive into the step-by-step process of building a lean-to shed roof overhang:
Step 1: Measure and Plan
Measure the length and width of the lean-to shed to determine the size of the roof overhang you want to create. Take into consideration the desired amount of shade or shelter you want to provide and the aesthetic appeal you want to achieve. Sketch out a detailed plan, including the dimensions and angles for the roof framing, and calculate the amount of lumber and other materials needed based on your measurements.
Step 2: Install the Rafters
Start by installing the rafters for the roof overhang. Cut the rafters to the desired length and angle, taking into consideration the pitch of the roof and the length of the overhang. Install the rafters perpendicular to the walls of the lean-to shed, making sure they are evenly spaced and level. Use a level and construction adhesive to secure the rafters to the walls, making sure they are plumb and aligned with the plan you have sketched out.
Step 3: Install Roof Framing
Once the rafters are securely attached to the walls, it's time to install the roof framing. Cut and install the roof framing members, including the ridge board, collar ties, and bracing, according to your plan. Make sure everything is square, level, and properly aligned. Use nails or screws to secure the framing members together, ensuring a sturdy and stable structure.
Step 4: Install Roofing Material
With the roof framing in place, it's time to install the roofing material of your choice. Depending on your preference and budget, you can use shingles, metal panels, or other appropriate roofing material. Follow the manufacturer's instructions and best practices for the specific type of roofing material you choose, ensuring proper installation to prevent leaks and other issues. Install flashing around the edges of the roof overhang to provide additional protection against water infiltration.
Step 5: Finish the Roof Overhang
Once the roofing material is installed, you can finish the roof overhang by adding the final touches. Install fascia boards and soffits to cover the exposed ends of the rafters and create a clean and finished appearance. You can also add additional trim, paint, or stain the roof overhang to match the style of your lean-to shed or the surrounding environment. Make sure all the finishing touches are properly installed and sealed to provide maximum protection and durability.
Conclusion
Building a lean-to shed roof overhang is a practical and rewarding DIY project that can enhance the functionality and aesthetics of your lean-to shed. By following the step-by-step guide outlined in this article, you can construct a roof overhang that provides protection from the elements, adds shade and shelter, and enhances the overall appearance of your lean-to shed. Remember to carefully plan, measure, and follow best practices during each step of the construction process to ensure a successful and durable roof overhang. With proper planning and execution, you can create a lean-to shed with a functional and attractive roof overhang that meets your needs and enhances your outdoor space.
Happy building!

0 comments:
Post a Comment
Note: Only a member of this blog may post a comment.