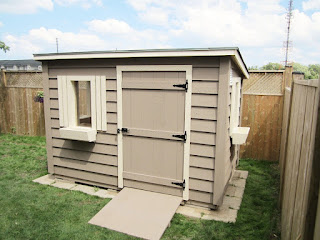
Now that you have completed the construction of your DIY 4x8 lean to shed, it is time to install the trim and doors to give it a polished and finished look. In this guide, we will take you through the step-by-step process of installing trim and doors on your shed.
Materials You Will Need
- Trim boards
- Doors
- Nails or screws
- Door hinges
- Door handle and lock
- Paint or stain (optional)
Step-by-Step Guide to Installing Trim and Doors
Step 1: Measure and Cut the Trim Boards
Start by measuring the length and width of the walls of your shed to determine the length of the trim boards you will need. Cut the boards to the appropriate length using a saw.
Step 2: Attach the Trim Boards to the Shed
Using nails or screws, attach the trim boards to the walls of your shed. Start at one corner and work your way around the shed, making sure the boards are level and flush against the walls.
Step 3: Install the Doors
Measure the doorway of your shed to determine the size of the doors you will need. Cut the doors to the appropriate size using a saw. Attach the door hinges to the doors and then to the doorframe of your shed. Install the door handle and lock according to the manufacturer's instructions.
Step 4: Paint or Stain (Optional)
If desired, you can paint or stain your trim boards and doors to match the color scheme of your shed or to provide extra protection against the elements.
Conclusion
By following these simple steps, you can easily install the trim and doors on your DIY 4x8 lean to shed, giving it a professional and polished finish. With proper maintenance and care, your shed will provide you with many years of use and enjoyment.

0 comments:
Post a Comment
Note: Only a member of this blog may post a comment.