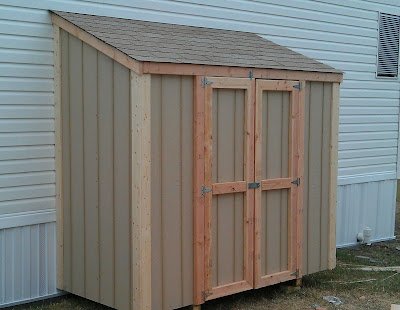
What is a Lean-To on a Shed?

A lean-to on a shed is an additional structure attached to the side of an existing shed. It typically consists of a slanted roof that slopes downward from the shed's wall, creating a covered area or an extension of the storage space. The lean-to is usually open on one or two sides, providing shelter from rain, sun, or other elements.
A lean-to on a shed can serve various purposes, including:
- Additional storage space: The lean-to can be used to store garden tools, equipment, firewood, bicycles, or any other items that need protection from the weather.
- Sheltered workspace: It can provide a covered area for DIY projects, gardening, or other outdoor activities, allowing you to work even during unfavorable weather conditions.
- Livestock or animal shelter: The lean-to can serve as a shelter for small livestock, such as chickens or goats, or provide a covered area for other animals, such as dogs.
- Outdoor relaxation area: You can create a cozy outdoor seating area or a covered patio space by adding some furniture or decorative elements to the lean-to.
The design and size of a lean-to can vary depending on individual preferences and the available space. It's important to consider local building codes, permits, and regulations before constructing a lean-to to ensure compliance with the law.
Materials you'll need:
- Pressure-treated lumber (2x4 and 4x4 boards)
- Plywood sheets
- Roofing materials (shingles, metal sheets, or corrugated plastic)
- Galvanized screws or nails
- Level
- Tape measure
- Circular saw or miter saw
- Drill or screwdriver
- Safety goggles
- Work gloves
Step 1: Planning and Preparation
- Determine the size and location of your lean-to. Measure the available space on the side of your shed where you want to attach the lean-to. Consider the purpose of the lean-to and plan accordingly.
- Obtain necessary permits or permissions from local authorities, if required.
Step 2: Clear the Area
- Remove any obstacles, vegetation, or debris from the ground where the lean-to will be constructed.
- Ensure the shed's wall is clean and free from any protruding objects.
Step 3: Building the Frame
- Measure and cut two 4x4 boards to the desired height of the lean-to.
- Attach one 4x4 board vertically against the shed's wall using galvanized screws or nails. This will act as the support for the lean-to.
- Measure and cut two 2x4 boards to the width of the lean-to. These will be the top and bottom plates.
- Attach the top and bottom plates horizontally to the 4x4 board, ensuring they are level and securely fastened.
- Measure and cut 2x4 boards to the desired height of the lean-to's roof slope.
- Attach these boards vertically between the top plate and the ground, evenly spaced to form the studs. The spacing will depend on the size of the lean-to, but a common spacing is 16 inches on center.
- Use a level to ensure the studs are plumb (vertical) and attach them securely to the top and bottom plates.
Step 4: Adding the Roof
- Measure and cut additional 2x4 boards to serve as the roof rafters. The number of rafters will depend on the width of the lean-to, but spacing them 24 inches apart is typical.
- Attach the rafters to the top plate, ensuring they are evenly spaced and perpendicular to the shed's wall.
- Measure and cut plywood sheets to fit the size of the roof. Place the plywood sheets on top of the rafters and attach them using screws or nails, spacing them appropriately.
- Apply the chosen roofing material (shingles, metal sheets, or corrugated plastic) over the plywood, following the manufacturer's instructions. Ensure the roofing material extends beyond the edges of the lean-to to provide adequate overhang.
Step 5: Finishing Touches
- Inspect the lean-to for any loose screws, nails, or connections. Tighten or reinforce as needed.
- If desired, paint or stain the lean-to to match the shed or to provide additional weather protection.
- Clean up the construction site, removing any waste materials and tools.
Congratulations! You have successfully built a lean-to on your shed. The lean-to can now be used for storage or as a covered area for various activities. Remember to follow local building codes and safety guidelines throughout the construction process.
0 comments:
Post a Comment
Note: Only a member of this blog may post a comment.