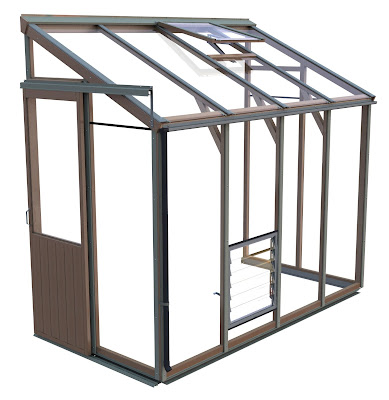
Measuring and preparing the frame for your lean-to greenhouse is a crucial step in the construction process. A well-measured and properly prepared frame will ensure the stability and structural integrity of your greenhouse. In this guide, we will walk you through the steps to measure and prepare the frame for your lean-to greenhouse.
1. Determine the Dimensions
Start by determining the dimensions of your lean-to greenhouse. Consider the available space, your gardening needs, and the desired size of the greenhouse. Measure the length, width, and height of the greenhouse, taking into account any specific requirements for your plants, shelving, or other features.
2. Select the Frame Material
Choose the appropriate material for your greenhouse frame. Common options include wood, metal, or PVC. Wood is a popular choice for its natural aesthetics and ease of construction. Metal frames provide durability and strength. PVC frames are lightweight, affordable, and resistant to corrosion. Select a material that suits your preferences, budget, and climate conditions.
3. Gather the Tools and Materials
Gather the necessary tools and materials for the frame construction. These may include measuring tape, a level, a saw, screws or nails, brackets or connectors (depending on the chosen frame material), and safety equipment such as gloves and goggles.
4. Mark the Wall or Structure
Mark the wall or structure where the lean-to greenhouse will be attached. Use a measuring tape and a pencil to mark the desired height and width of the greenhouse. Ensure that the markings are level and accurately represent the dimensions you determined earlier.
5. Measure and Cut the Frame Components
Using the measurements from the marked wall or structure, measure and cut the frame components accordingly. If you're using wood, use a saw to cut the wooden beams or planks to the desired lengths. Take precise measurements and ensure clean, accurate cuts to achieve a proper fit during assembly.
6. Prepare the Frame Components
Before assembling the frame, it's important to prepare the components for installation. Sand any rough edges or surfaces to prevent splinters or injuries. Apply a protective finish or sealant to the frame components, especially if you're using wood, to enhance durability and resistance to moisture.
7. Attach the Frame to the Wall or Structure
With the prepared frame components in hand, attach them to the marked wall or structure. Use appropriate screws, nails, brackets, or connectors depending on the chosen frame material. Ensure that the frame is securely fastened and level. Use a level to check the vertical and horizontal alignment of the frame as you attach each component.
8. Reinforce the Frame
To provide additional stability and support, reinforce the frame at key points. Use corner brackets, cross braces, or diagonal supports to strengthen the structure. This will help withstand wind loads and other external forces that may affect the stability of your lean-to greenhouse.
9. Check for Level and Square
After assembling the frame, check for levelness and squareness. Use a level to ensure that the frame is level from side to side and front to back. Verify the squareness by measuring the diagonals of the frame. Adjust the frame as needed to achieve a level and square structure, as this will contribute to the proper installation of the greenhouse panels.
By following these steps,you can effectively measure and prepare the frame for your lean-to greenhouse. Taking accurate measurements, selecting the appropriate materials, and ensuring proper alignment and stability will set a solid foundation for the rest of your greenhouse construction process.

0 comments:
Post a Comment
Note: Only a member of this blog may post a comment.