Showing posts with label Framing. Show all posts

Wednesday, April 12, 2023

8x10 Lean-To Shed: Using Pressure-Treated Lumber for Base, Walls, and Roof Framing

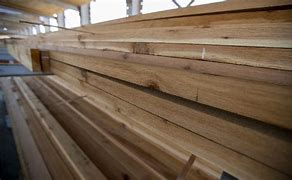
8x10 Lean-To Shed Using Pressure-Treated Lumber for Base

If you're planning to build an 8x10 lean-to shed, one of the most critical decisions you'll need to make is choosing the right materials. Among the many options available, pressure-treated lumber stands out as a popular choice for the base, walls, and roof framing of a shed. In this article, we'll explore why pressure-treated lumber is an excellent option for shed construction and provide some tips for using it effectively. So let's dive in and learn more about this durable and reliable material!

Why Choose Pressure-Treated Lumber?

Pressure-treated lumber is wood that has been treated with chemicals to protect it from rot, decay, and insect damage. The treatment process involves placing the wood in a pressure chamber and forcing preservatives deep into the wood fibers, creating a long-lasting and durable material that is resistant to moisture and pests. Here are some reasons why pressure-treated lumber is a popular choice for shed construction:

1. Rot and Decay Resistance:

Sheds are exposed to the elements, including rain, snow, and humidity, which can cause wood to rot and decay over time. Pressure-treated lumber is specially treated to resist rot and decay, making it ideal for shed construction. It can withstand exposure to moisture without deteriorating, ensuring the longevity and durability of your shed.

2. Insect Resistance:

Insects like termites, carpenter ants, and beetles can cause significant damage to wood structures, including sheds. Pressure-treated lumber is treated with preservatives that repel insects, protecting your shed from infestations and potential structural damage.

3. Durability:

Pressure-treated lumber is designed to withstand harsh outdoor conditions and resist wear and tear. It is less susceptible to warping, splitting, and cracking compared to untreated wood, ensuring that your shed remains sturdy and reliable for years to come.

4. Cost-Effective:

While pressure-treated lumber may be slightly more expensive than untreated wood, it offers long-term cost savings due to its durability and resistance to rot, decay, and insects. Choosing pressure-treated lumber for your shed can help you avoid costly repairs or replacements in the future.

Using Pressure-Treated Lumber for Shed Construction

When using pressure-treated lumber for your 8x10 lean-to shed, it's essential to follow some best practices to ensure proper installation and maximum performance. Here are some tips to keep in mind:

1. Select the Right Grade and Size:

Pressure-treated lumber comes in different grades and sizes, so be sure to choose the right type for your shed construction. For framing, use a suitable grade, such as #2 or better, which offers good strength and durability. For the base, use treated lumber that is rated for ground contact to withstand moisture from the soil.

2. Use Appropriate Fasteners:

When working with pressure-treated lumber, it's important to use fasteners that are approved for use with treated wood to prevent corrosion and ensure proper installation. Use hot-dipped galvanized or stainless-steel nails, screws, or bolts that are specifically designed for use with treated lumber to avoid damage or premature failure of the fasteners.

3. Follow Proper Construction Techniques:

Follow industry-approved construction techniques when using pressure-treated lumber for your shed framing. Use appropriate framing techniques such as standard stud spacing, proper notching and joining of framing members, and appropriate bracing to ensure structural integrity. It's also essential to follow local building codes and regulations for shed construction, including any specific requirements for pressure-treated lumber.

4. Protect Exposed Ends and Cuts:

When cutting pressure-treated lumber, be sure to protect the exposed ends and cuts with an appropriate wood preservative. The cut ends of pressure-treated lumber are more susceptible to moisture and insect damage, so applying a wood preservative to these areas will help prevent rot and decay. Follow the manufacturer's instructions for the wood preservative and allow it to dry before proceeding with the construction.

5. Allow for Proper Ventilation:

Proper ventilation is crucial for sheds to prevent moisture buildup and promote airflow. When using pressure-treated lumber for walls and roof framing, ensure that there is adequate ventilation to allow for proper air circulation. This can be achieved by leaving gaps between boards or using vents in the walls or roof of the shed, as recommended by your shed plans or local building codes.

6. Maintain Regular Maintenance:

While pressure-treated lumber is resistant to rot, decay, and insects, regular maintenance is still necessary to ensure its long-term performance. Periodically inspect your shed for any signs of damage or decay, and address them promptly. Apply wood preservative or stain as needed to protect the wood from moisture and UV rays. Regular maintenance will help prolong the lifespan of your shed and keep it in good condition for years to come.

Conclusion

Using pressure-treated lumber for the base, walls, and roof framing of your 8x10 lean-to shed is an excellent choice for its durability, resistance to rot, decay, and insects, and long-term cost savings. By following proper installation techniques, protecting exposed ends and cuts, allowing for proper ventilation, and maintaining regular maintenance, you can ensure that your shed remains sturdy and reliable for many years. Remember to always follow local building codes and regulations and consult your shed plans or a professional if you have any questions or concerns. Happy building!
Share:

Monday, April 10, 2023

Framing a Lean-to Shed Roof: A Step-by-Step Guide


Building a lean-to shed can be a great solution for additional storage or shelter space. One key element in constructing a lean-to shed is framing the roof properly to ensure its stability and durability. In this article, we will provide a step-by-step guide on how to frame a lean-to shed roof, including materials, tools, and techniques needed for a successful construction project.

Materials and Tools

Before you start framing your lean-to shed roof, you will need to gather the following materials and tools:

  • Lumber: Choose pressure-treated lumber or other suitable framing material that is durable and can withstand outdoor conditions.
  • Roofing material: This can include plywood or OSB for the roof sheathing, followed by roofing shingles, metal panels, or other appropriate roofing material of your choice.
  • Fasteners: Use appropriate nails, screws, or bolts for attaching the framing members together.
  • Measuring tape, level, and square: These tools are essential for ensuring accurate measurements and square cuts.
  • Saw: A circular saw or a miter saw can be used for cutting lumber to the required lengths.
  • Hammer or drill: Depending on the fasteners you choose, you will need a hammer or drill for installation.
  • Safety equipment: Always prioritize safety and wear appropriate gear such as goggles, gloves, and a hard hat during construction.

Step-by-Step Guide

Follow these steps to frame a lean-to shed roof:

Step 1: Determine the Roof Pitch

The first step in framing a lean-to shed roof is to determine the desired roof pitch. The roof pitch refers to the slope of the roof, and it can affect the shed's appearance, shedding of rainwater, and structural integrity. Consider factors such as local building codes, weather conditions, and personal preferences when determining the appropriate roof pitch for your shed. Once you have decided on the roof pitch, use a level and measuring tape to mark the appropriate angles on the framing members.

Step 2: Measure and Cut the Rafters

The next step is to measure and cut the rafters for your lean-to shed roof. Rafters are the sloping members that support the roof sheathing and transfer the weight of the roof to the walls. Measure and cut the rafters according to the angles and lengths determined in Step 1. Make sure the cuts are accurate and square for proper fit and alignment.

Step 3: Install the Ridge Board

The ridge board is a horizontal member that connects the tops of the rafters at the peak of the roof. Install the ridge board by aligning it with the top ends of the rafters and securing it in place with appropriate fasteners. Use a level to ensure that the ridge board is level and straight, as it serves as a reference point for the rest of the roof framing.

Step 4: Install the Rafter Tails

Rafter tails are the lower ends of the rafters that overhang the walls of the shed. Install the rafter tails by attaching them to the wall framing using appropriate fasteners. Make sure the rafter tails are level and evenly spaced, and that they extend beyond the walls by the desired amount for the roof overhang.

Step 5 : Install the Roof Sheathing

Once the rafters and ridge board are in place, it's time to install the roof sheathing. Use plywood or OSB panels to cover the entire roof surface, making sure to align the edges and fasten the panels securely to the rafters with nails or screws. Leave a small gap between the panels for expansion and contraction due to changes in temperature and humidity. Use a circular saw or jigsaw to cut openings for vents, if needed.

Step 6: Install the Roofing Material

After the roof sheathing is installed, it's time to apply the roofing material of your choice. This can include shingles, metal panels, or other appropriate roofing material. Follow the manufacturer's instructions for installation, making sure to overlap the material properly and use appropriate fasteners. Install any flashing, ridge caps, or other accessories as needed for a watertight seal and proper ventilation.

Step 7: Finish the Lean-to Shed

With the roof framing and roofing material in place, you can now finish the rest of the lean-to shed construction. Install the walls, doors, and windows according to your design and preferences. Add any additional insulation, electrical wiring, or interior finishes as needed. Paint or stain the shed to protect it from the elements and enhance its appearance. Finally, clean up the construction site and ensure that all fasteners are properly secured for a safe and finished lean-to shed.

Conclusion

Framing a lean-to shed roof is a crucial step in constructing a sturdy and durable lean-to shed. By following the step-by-step guide and using the appropriate materials, tools, and techniques, you can successfully frame a lean-to shed roof that will provide reliable shelter and storage for your needs. Remember to always prioritize safety and follow local building codes and regulations. With proper planning and execution, you can build a functional and attractive lean-to shed that will serve you well for years to come.

Whether you're a seasoned DIY enthusiast or a beginner in construction projects, framing a lean-to shed roof may seem intimidating. However, with the right materials, tools, and instructions, it can be a manageable and rewarding project. Follow the steps outlined in this guide, and you'll be on your way to building a lean-to shed with a strong and stable roof that will withstand the test of time.


Share: