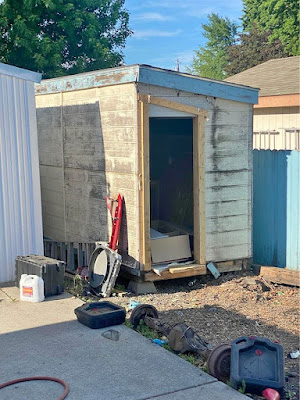
Building a
small lean-to shed is a great DIY project that can provide valuable storage space in your backyard. Whether you need a place to store gardening tools, outdoor equipment, or other belongings, a small lean-to shed is a practical and cost-effective solution. Here is a step-by-step guide to help you build your own small lean-to shed.
Materials Needed
Before you begin, gather the following materials:
- Pressure-treated 4x4 lumber for the posts
- Pressure-treated 2x4 lumber for the frame
- Plywood sheets for the walls and roof
- Roofing materials (such as shingles, metal sheets, or polycarbonate panels)
- Nails, screws, and appropriate fasteners
- Door hardware (hinges, latch, handle)
- Paint or stain (optional)
Tools Needed
Ensure you have the following tools on hand:
- Tape measure
- Pencil
- Circular saw or handsaw
- Power drill or screwdriver
- Level
- Hammer
- Roofing nails or screws
Step-by-Step Guide
1. Choose a Location
Select a suitable location in your backyard for the lean-to shed. Ensure it's level and provides easy access to the items you plan to store.
2. Measure and Mark
Measure and mark the dimensions of your shed on the ground using a tape measure and pencil. A common size for a small lean-to shed is around 6 feet by 4 feet.
3. Dig Post Holes
Using a post-hole digger, dig two holes where the front corners of the shed will be located. The holes should be deep enough to accommodate the length of the 4x4 posts and provide stability.
4. Install the Posts
Place the 4x4 posts in the holes and use a level to ensure they are plumb. Fill the holes with concrete and allow it to set according to the manufacturer's instructions.
5. Build the Frame
Cut the 2x4 lumber to create the frame of the shed. Attach the top and bottom plates between the two posts using nails or screws. Then, cut and attach the vertical studs at regular intervals to create the walls.
6. Add the Walls and Roof
Cut plywood sheets to fit the dimensions of the shed walls and roof. Attach them to the frame using nails or screws. For the roof, consider using roofing materials like shingles, metal sheets, or polycarbonate panels for weather protection.
7. Install the Door
Cut a section of the wall for the door opening and attach the door frame. Install hinges, a latch, and a handle to complete the door installation.
8. Finishing Touches
If desired, paint or stain the shed to protect the wood and enhance its appearance. You can also add additional features such as shelves or hooks to optimize storage and organization.
Conclusion
By following this step-by-step guide, you can build your own small lean-to shed. Remember to prioritize safety by using appropriate tools and techniques. With your completed shed, you'll have a

0 comments:
Post a Comment
Note: Only a member of this blog may post a comment.